Loki与promtail实现日志监控
Loki日志监控部署与配置
参考:semaik博主的博客
一. Loki简介
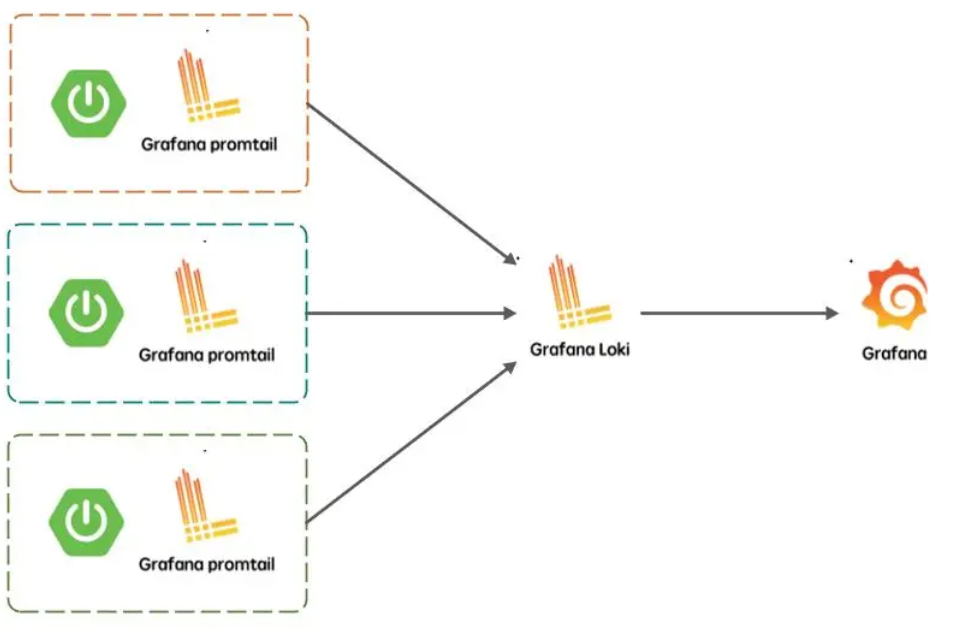
Loki相比EFK/ELK,它不对原始日志进行索引,只对日志的标签进行索引,而日志通过压缩进行存储,通常是文件系统存储,所以其操作成本更低,数量级效率更高- 由于
Loki的存储都是基于文件系统的,所以它的日志搜索时基于内容即日志行中的文本,所以它的查询支持LogQL,在搜索窗口中通过过滤标签的方式进行搜索和查询 Loki分两部分,Loki是日志引擎部分,Promtail是收集日志端,然后通过Grafana进行展示- 必须要使用高版本的
grafana否则会出现无法explore查询不出数据的错误 - 本章前面部分只用一台服务器部署,如需收集其他节点日志,只需在被收集端部署
Promtail Agent即可 见文档末尾扩展部分
Promtail: 代理,负责收集日志并将其发送给 loki
Loki: 日志记录引擎,负责存储日志和处理查询
Grafana: UI界面与
prometheus集成此处略拖补图
Loki的官方文档: https://grafana.com/docs/loki/latest/installation- 从官方文档看,
Loki支持源码安装、Docker、Helm、Local、Tanka
二. Docker-Compose部署
1. 配置文件获取:
NOTE: Loki配置文件下载路径
https://raw.githubusercontent.com/grafana/loki/master/cmd/loki/loki-local-config.yaml
Promtail配置文件下载路径https://raw.githubusercontent.com/grafana/loki/main/clients/cmd/promtail/promtail-local-config.yaml
目录结构
root@zznn:/opt# tree loki/
loki/
├── docker-compose.yml
├── loki-local-config.yaml
└── promtail-local-config.yaml
2. docker-compose.yml配置文件
1 | version: "3" |
NOTE: 使用grafana报警时可选renderer
3. loki配置文件loki-local-config.yaml留存
- 官方下载的文件默认即可,不用修改
1 | auth_enabled: false |
4. Promtail配置文件promtail-local-config.yaml留存及解析(此处配置本机)
1 | server: |
与
prometheus集成时只需将下方配置加入docker-compose.yml文件即可(可选)
2
3
4
5
6
7
8
9
10
11
12
13
14
15
16
17
18
19
20
21
22
23
24
image: prom/prometheus:latest
restart: always
container_name: prometheus
hostname: prometheus
environment:
TZ: Asia/Shanghai
ports:
- 9090:9090
user: root
volumes:
- ./prometheus.yml:/etc/prometheus/prometheus.yml
- ./data/monitor/prometheus:/prometheus/data:rw
#- /data/monitor/prometheus:/prometheus/data:rw
command:
- "--config.file=/etc/prometheus/prometheus.yml"
- "--storage.tsdb.path=/prometheus"
- "--storage.tsdb.retention.time=15d"
#- "--web.console.libraries=/usr/share/prometheus/console_libraries"
#- "--web.console.templates=/usr/share/prometheus/consoles"
#- "--enable-feature=remote-write-receiver"
#- "--query.lookback-delta=2m"
networks:
- loki
prometheus.yml配置
2
3
4
5
6
7
8
9
10
11
12
13
14
15
16
17
18
19
20
scrape_interval: 15s
evaluation_interval: 15s
# 告警(一般不用)
alerting:
alertmanagers:
- static_configs:
- targets: ['alertmanager:9093']
# 告警规则
rule_files:
- rules/*.yml
# 监控插件
scrape_configs:
- job_name: 'prometheus'
static_configs:
- targets: ['prometheus:9090']
# telegraf采集插件
- job_name: 'loki'
static_configs:
- targets: ['loki:3100']
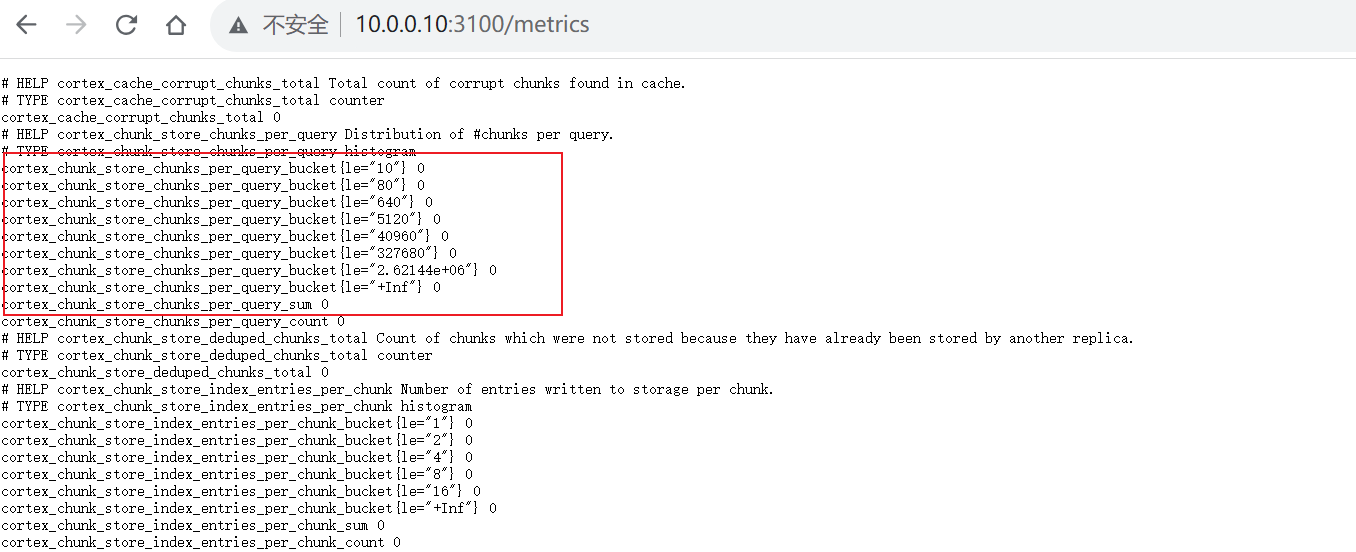
prometheus集成效果访问:
http://10.0.0.10:3100/metrics查看监控数据
prometheus效果:
三. 扩展(SSL以及集群版本普通节点部署)
①. grafana更换SSL
报错:ERR_SSL_PROTOCOL_ERROR
1 | # 将grafana配置文件cp到本地 |
更改grafana配置文件granfan.ini后重启即可使用自己的SSL证书
②. 集群版本
规划:
| IP | 角色 |
|---|---|
| 10.0.0.10 | master (管理节点 部署:loki Promtail-agent grafana 此处见四以上文档部分) |
| 10.0.0.11 | 普通节点(部署Promtail-agent) |
普通节点Promtail-agent docker-compose.yml配置
1 | version: "3" |
promtail-local-config.yaml配置指向管理节点loki
2
3
4
5
6
7
8
9
10
11
12
13
14
15
16
17
18
19
20
21
22
23
24
25
26
27
28
29
30
31
32
33
34
35
36
37
38
39
40
41
42
43
44
45
46
47
48
http_listen_port: 9080
grpc_listen_port: 0
positions:
filename: /tmp/positions.yaml
clients:
# 本机直接修改为http://loki:3100/loki/api/v1/push即可
# 此处指向部署节点loki 要修改为loki节点的ip loki节点ip为10.0.0.10
- url: http://10.0.0.10:3100/loki/api/v1/push
scrape_configs:
- job_name: system
static_configs:
- targets:
- localhost # 代表收集promtail本机的日志目录
labels:
# 将会作为索引查询,除了"__path__"外,其他的"key: value"可以自定义
job: "10.0.0.11_varlogs"
# 收集日志的目录
__path__: /var/log/*log
# apt日志 构建完成后使用apt安装一个软件 用于测试是否成功采集到日志
- job_name: test
static_configs:
- targets:
- localhost
labels:
job: "10.0.0.11_test"
__path__: /var/log/yum.log
# 其他服务日志实例,可按照以下模板修改
- job_name: nginx
static_configs:
- targets:
- localhost
labels:
job: "70.60-nginx"
__path__: /var/log/nginx/*log
- job_name: db
static_configs:
- targets:
- localhost
labels:
job: "70.60-mysql"
__path__: /var/log/mysqld.log安装
lrzsz后测试dashboard效果yum install -y lrzsz此时标签为10.0.0.10_test下监控日志文件/var/log/yum.log详情出现在面板中。
grafana 13639 dashboard效果:
安装
lrzsz后:
普通节点部署完成。
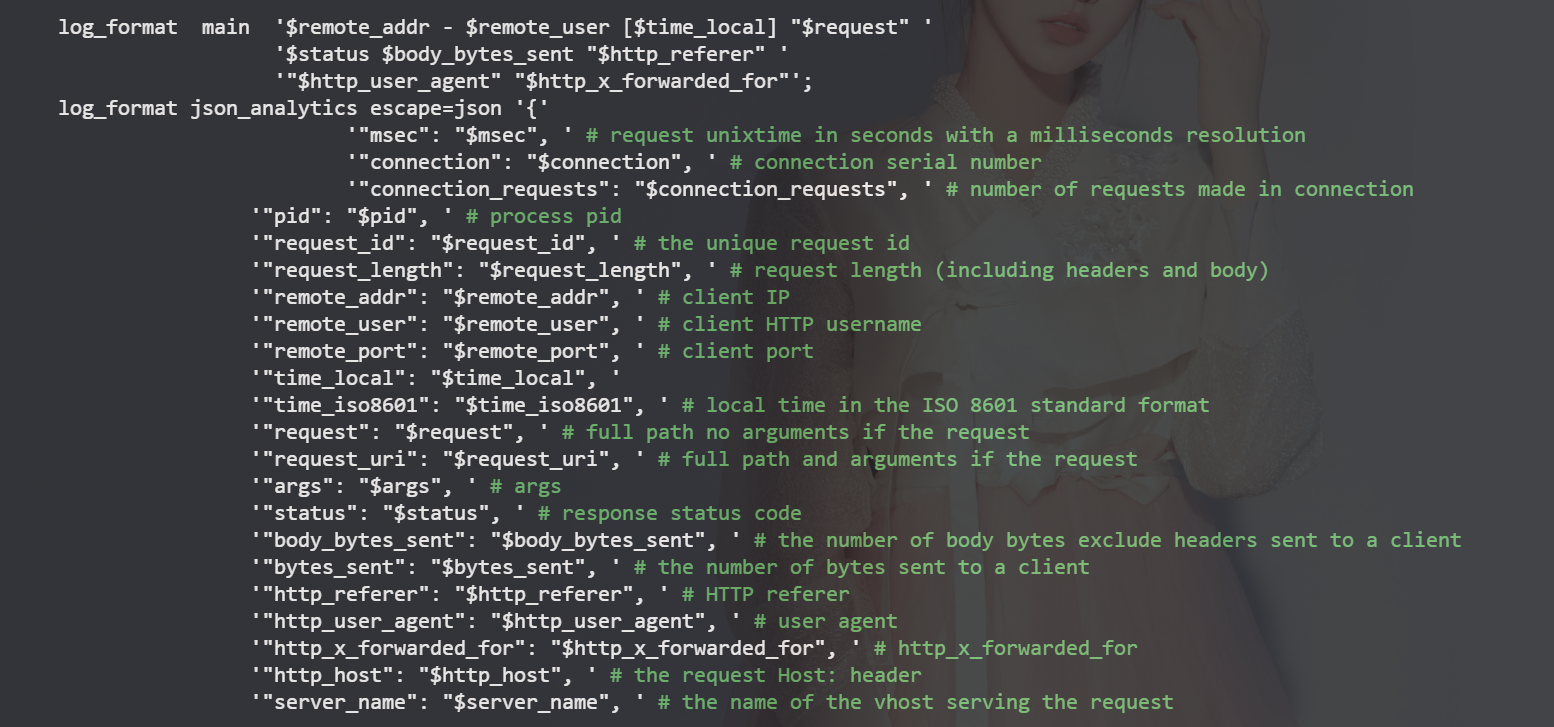
四. 当监控nginx时需要修改nginx的日志格式( 测试未成功-忽略)
Note: 此处
nginx为编译部署参考-轻量级日志可视化平台Grafana Loki接入nginx访问日志-腾讯云开发者社区-腾讯云 (tencent.com)
执行修改
/usr/local/nginx/conf/nginx.conf1
2
3
4
5
6
7
8
9
10
11
12
13
14
15
16
17
18
19
20
21
22
23
24
25
26
27
28
29
30
31
32
33
34
35
36
37
38
39
40
41
42
43
44
45
46
47
48http {
include mime.types;
default_type application/octet-stream;
log_format main '$remote_addr - $remote_user [$time_local] "$request" '
'$status $body_bytes_sent "$http_referer" '
'"$http_user_agent" "$http_x_forwarded_for"';
log_format json_analytics escape=json '{'
'"msec": "$msec", ' # request unixtime in seconds with a milliseconds resolution
'"connection": "$connection", ' # connection serial number
'"connection_requests": "$connection_requests", ' # number of requests made in connection
'"pid": "$pid", ' # process pid
'"request_id": "$request_id", ' # the unique request id
'"request_length": "$request_length", ' # request length (including headers and body)
'"remote_addr": "$remote_addr", ' # client IP
'"remote_user": "$remote_user", ' # client HTTP username
'"remote_port": "$remote_port", ' # client port
'"time_local": "$time_local", '
'"time_iso8601": "$time_iso8601", ' # local time in the ISO 8601 standard format
'"request": "$request", ' # full path no arguments if the request
'"request_uri": "$request_uri", ' # full path and arguments if the request
'"args": "$args", ' # args
'"status": "$status", ' # response status code
'"body_bytes_sent": "$body_bytes_sent", ' # the number of body bytes exclude headers sent to a client
'"bytes_sent": "$bytes_sent", ' # the number of bytes sent to a client
'"http_referer": "$http_referer", ' # HTTP referer
'"http_user_agent": "$http_user_agent", ' # user agent
'"http_x_forwarded_for": "$http_x_forwarded_for", ' # http_x_forwarded_for
'"http_host": "$http_host", ' # the request Host: header
'"server_name": "$server_name", ' # the name of the vhost serving the request
'"request_time": "$request_time", ' # request processing time in seconds with msec resolution
'"upstream": "$upstream_addr", ' # upstream backend server for proxied requests
'"upstream_connect_time": "$upstream_connect_time", ' # upstream handshake time incl. TLS
'"upstream_header_time": "$upstream_header_time", ' # time spent receiving upstream headers
'"upstream_response_time": "$upstream_response_time", ' # time spend receiving upstream body
'"upstream_response_length": "$upstream_response_length", ' # upstream response length
'"upstream_cache_status": "$upstream_cache_status", ' # cache HIT/MISS where applicable
'"ssl_protocol": "$ssl_protocol", ' # TLS protocol
'"ssl_cipher": "$ssl_cipher", ' # TLS cipher
'"scheme": "$scheme", ' # http or https
'"request_method": "$request_method", ' # request method
'"server_protocol": "$server_protocol", ' # request protocol, like HTTP/1.1 or HTTP/2.0
'"pipe": "$pipe", ' # "p" if request was pipelined, "." otherwise
'"gzip_ratio": "$gzip_ratio", '
'"http_cf_ray": "$http_cf_ray"'
'}';
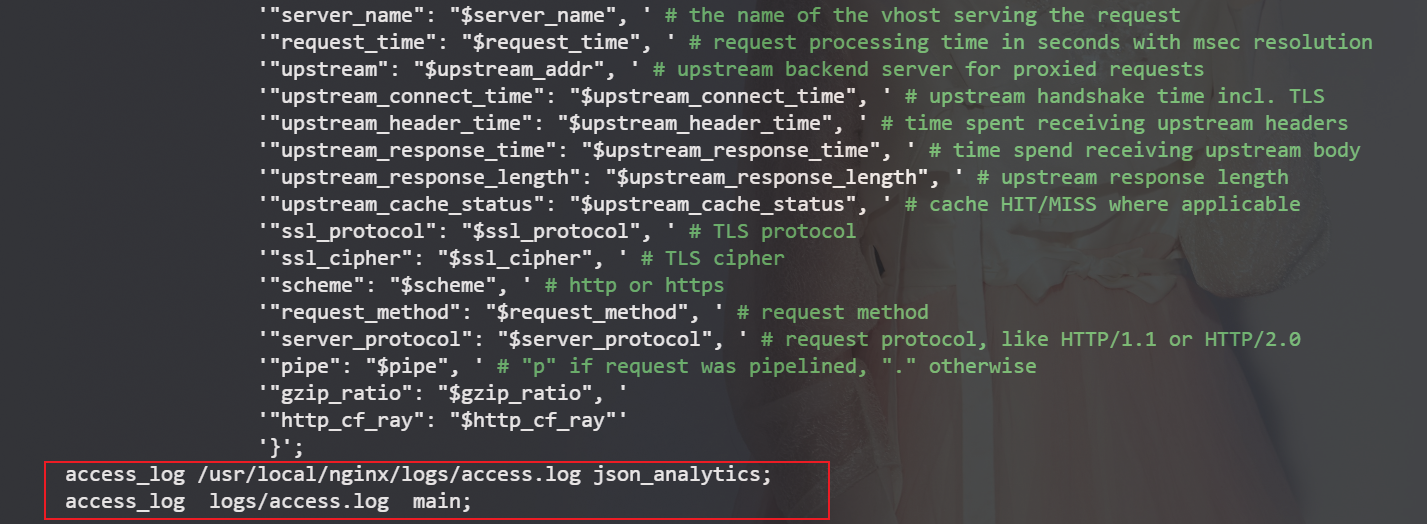
access_log /usr/local/nginx/logs/access.log json_analytics;
access_log logs/access.log main;截图:
重启
nginx查看日志格式变化情况1
2# 重启nginx
systemctl restart nginxNOTE: 测试未成功
五. 部署节点 与grafana (13639)结合效果
NOTE: 添加完成后需要等待一段时间等产生新的日志后才能在explore中查询出日志
如:
apt install -y lrzsz后job标签test随即出现日志
与本机实际最新日志对比一模一样
教程结束。


